
car decal instructions
Car decals enhance vehicle aesthetics and serve functional purposes like identification or branding. Proper application ensures durability and a professional finish‚ making it essential to follow detailed guidelines.
1.1 Importance of Proper Decal Application
Proper decal application ensures a professional finish‚ prevents bubbling‚ and guarantees durability. Incorrect techniques can lead to peeling‚ air pockets‚ or misalignment‚ reducing the decal’s lifespan. Clean surfaces and optimal temperatures are critical for proper adhesion. Using tools like squeegees and transfer tape minimizes errors. Following step-by-step instructions ensures the decal adheres evenly‚ maintaining its appearance and functionality. Proper application also prevents costly rework and ensures compliance with regulations for legal decals‚ making it essential for both aesthetic and functional purposes.
1.2 Overview of the Decal Application Process
The decal application process involves several key steps to ensure a successful outcome. Start by cleaning the surface thoroughly with soap and water or alcohol to remove dirt and oils. Next‚ prepare the decal by peeling it slowly from the backing paper. Apply the decal to the cleaned surface‚ using a squeegee or credit card to press firmly and eliminate air bubbles. For larger decals‚ the wet application method with a soap solution can help align and smooth the decal. Finally‚ allow the decal to dry completely before exposing it to direct sunlight or water. Proper alignment and patience are crucial for a professional finish.
Types of Car Decals
Car decals include vinyl‚ custom‚ reflective‚ and commemorative options‚ each serving unique purposes like branding‚ decoration‚ or legal compliance‚ offering versatility for various vehicle customization needs.
2.1 Vinyl Decals
Vinyl decals are durable and versatile‚ offering a wide range of designs for vehicle customization. They are weather-resistant and can withstand outdoor conditions for years. Available in various finishes‚ such as glossy or matte‚ vinyl decals are ideal for decorative or functional purposes. Application typically involves transfer tape‚ ensuring precise placement on surfaces like windows‚ bumpers‚ or paint. Vinyl decals are easy to apply and remove‚ making them a popular choice for both temporary and long-term use on cars.
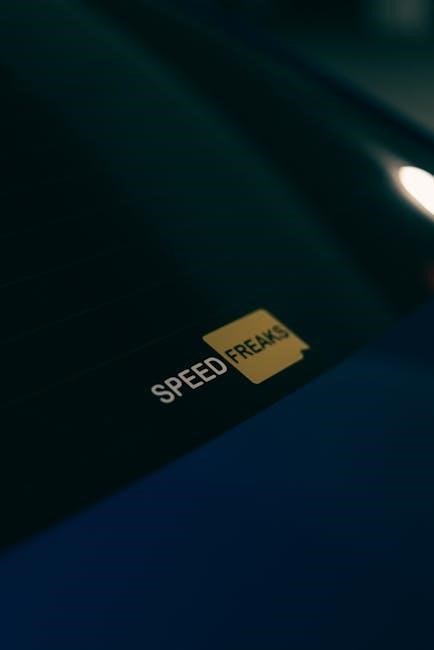
2.2 Custom Decals
Custom decals allow personalization‚ enabling users to create unique designs tailored to their preferences. They are ideal for branding‚ personal expression‚ or commemorative purposes. Custom decals can be crafted in various shapes‚ sizes‚ and colors‚ ensuring they stand out. Advanced printing technologies make intricate designs possible‚ and they can be applied to multiple surfaces. Whether for business promotion or personal style‚ custom decals offer flexibility and creativity‚ allowing individuals to make their vehicles truly distinctive. This makes them a popular choice for those seeking a personalized touch on their cars.
2.3 Reflective Decals
Reflective decals are designed to enhance visibility‚ making them ideal for safety and emergency vehicles. They use specialized materials that reflect light‚ ensuring they are visible in low-light conditions. These decals are durable and resistant to fading‚ making them suitable for outdoor use. They are commonly applied to bumpers‚ sides‚ or rear windows of cars. Proper application involves ensuring the surface is clean and dry‚ and avoiding direct sunlight during installation. Regular cleaning is recommended to maintain their reflective properties and ensure optimal performance over time.
2.4 Commemorative and Specialty Decals
Commemorative and specialty decals celebrate events‚ milestones‚ or unique identities. They are often custom-designed and feature vibrant graphics or personalized messages. These decals are popular for sports teams‚ memorials‚ or cultural themes. Made from high-quality vinyl‚ they are durable and weather-resistant. Application typically involves a clean‚ dry surface and can be done using transfer tape for precise placement. Specialty decals may require additional care to maintain their intricate designs‚ ensuring they remain vibrant and intact for years. They add a personal touch to vehicles‚ making them stand out on the road.

Preparing for Decal Application
Clean the surface with soap and water or alcohol. Ensure the area is dry and free of dust. Ideal temperature for application is between 60-74°F.
3.1 Cleaning the Application Area
Cleaning the area thoroughly is crucial for proper decal adhesion. Use a mixture of mild soap and water or alcohol to remove dirt‚ grease‚ or wax. Avoid harsh chemicals. Ensure the surface is dry and free of residue before applying the decal. A clean surface prevents air bubbles and ensures a long-lasting bond. Regular cleaning also maintains the decal’s appearance and durability. Always inspect the area for any imperfections that might interfere with the application process.
3.2 Importance of Surface Temperature
Surface temperature plays a vital role in decal application. Ideal temperatures range between 60°F and 90°F (15°C to 32°C). Extreme heat can soften the adhesive‚ causing it to spread unevenly‚ while cold temperatures may reduce stickiness. Applying decals in a moderate environment ensures proper adhesion and prevents air bubbles. Avoid applying decals in direct sunlight or on surfaces exposed to extreme conditions. Room temperature is typically ideal‚ making indoor application more controlled and effective. Always check the surface temperature before starting the application process for optimal results.
3.3 Drying Time After Cleaning
Allow the cleaned surface to dry completely before applying the decal. Drying time typically ranges from 10 to 30 minutes‚ depending on environmental conditions. Moisture can interfere with adhesion‚ leading to bubbles or poor stickiness. For freshly painted surfaces‚ wait at least four to six weeks to ensure the paint is fully cured. Proper drying ensures a strong bond between the decal and the surface‚ enhancing durability and appearance. Always inspect the area for any remaining moisture before proceeding with the application.
Application Methods
- Dry method: Apply directly with a squeegee or credit card for small decals.
- Wet method: Use a soap solution for larger decals‚ ensuring proper alignment.
- Transfer tape: Simplifies placement and alignment‚ especially for complex designs.
- Temperature: Ideal application temperatures range from 60 to 74°F.
4.1 Dry Application Method
The dry application method is ideal for small to medium-sized decals. Start by cleaning the surface thoroughly with alcohol or soap and water. Peel the decal from its backing and align it with the desired location; Use a squeegee or credit card to press the decal firmly‚ starting from the center and working outward to eliminate air bubbles. This method ensures a bubble-free application and is best suited for smooth surfaces like glass or painted metal. Patience is key to achieving a professional-looking result without wrinkles or misalignment.
4.2 Wet Application Method
The wet application method is perfect for large decals or complex shapes. After cleaning the surface‚ mix a mild soap solution and lightly spray the area. Peel the decal and apply it to the wet surface‚ using a squeegee to remove excess liquid. Start from the center‚ working outward to ensure no air bubbles form. Allow the decal to dry completely before handling the vehicle. This method reduces risk of wrinkles and ensures a seamless application on challenging surfaces‚ making it ideal for professional results with minimal effort and maximum adhesion.
4.3 Using Transfer Tape
Transfer tape is essential for precise decal placement. Apply the tape firmly over the decal‚ ensuring it adheres completely. Peel away the backing paper slowly‚ then position the decal on the vehicle. Use a squeegee to press the tape and decal onto the surface‚ starting from the center and moving outward to avoid air bubbles. Once applied‚ remove the transfer tape carefully to leave the decal intact. This method ensures accuracy and prevents misalignment‚ especially for intricate designs or multiple-layer decals‚ providing a professional finish with ease.
Placement and Positioning
Proper placement involves centering‚ aligning‚ and using a level for straight decals. Consider vehicle regulations and surface smoothness for optimal visibility and adherence.
5.1 Choosing the Right Location
Selecting the right location for your decal is crucial. Consider visibility‚ surface texture‚ and legal requirements. Smooth surfaces like glass or metal are ideal for decals to ensure proper adhesion. Avoid areas with curves or angles that could cause the decal to lift or bubble. Also‚ check local regulations to ensure your decal placement complies with any legal standards. Using masking tape to temporarily hold the decal in place can help you visualize its final position before application.
5.2 Centering and Aligning Decals
Centering and aligning decals ensures a professional finish. Measure the surface dimensions and mark the center point. Align the decal’s center with this mark‚ using the decal’s edges as a guide. For precise alignment‚ place masking tape along the top or bottom edge of the decal to hold it in position. Adjust as needed before applying pressure. This step is critical for achieving a balanced and visually appealing result‚ especially on large or intricate surfaces.
5.3 Using a Level for Straight Alignment
A level ensures precise‚ straight alignment of decals. Place the level on the decal’s edge and adjust it until the bubble centers. This guarantees the decal is perfectly horizontal or vertical. For larger decals‚ align one edge first‚ then adjust the opposite side while checking the level. Once aligned‚ secure the decal with masking tape to maintain position during application. This step prevents crooked placement‚ ensuring a professional and balanced appearance for your vehicle’s decals.
Tools and Materials Needed
Essential tools include a squeegee‚ credit card‚ soap solution‚ masking tape‚ and a level. These aid in smooth‚ precise decal application and alignment.
6.1 Squeegee or Credit Card
A squeegee or credit card is essential for pressing the decal firmly onto the surface‚ ensuring proper adhesion. Use it to smooth out air bubbles and excess moisture during application. Gently rub the decal from the center outward to eliminate wrinkles and bubbles. This tool helps achieve a smooth‚ professional finish. For large decals‚ a squeegee is more effective‚ while a credit card works well for smaller designs. Always apply firm‚ even pressure to ensure the decal adheres correctly to the vehicle’s surface.
6.2 Soap and Water Solution
A mild soap and water solution is crucial for the wet application method. Mix a small amount of soap with water in a spray bottle. This solution acts as a lubricant‚ allowing the decal to slide into position without air bubbles. Spray the solution onto the cleaned surface before applying the decal. After positioning‚ use a squeegee or credit card to press out excess liquid. The solution evaporates‚ leaving the decal securely adhered. Avoid using harsh chemicals‚ as they may damage the decal or the vehicle’s surface;
6.3 Masking Tape
Masking tape is a handy tool for positioning decals accurately. Apply small pieces of tape to secure the decal’s edges‚ ensuring proper alignment and centering. This helps prevent the decal from shifting during application. Use the tape to mark reference points or hold the decal in place while applying pressure with a squeegee. Once the decal is securely adhered‚ carefully remove the tape to avoid pulling or distorting the vinyl. Masking tape ensures a precise‚ professional finish without damaging the decal or the vehicle’s surface.

Aftercare and Maintenance
Regularly clean decals with mild soap and water to maintain appearance. Avoid harsh chemicals and high-pressure washes‚ which can damage the vinyl. Proper care ensures longevity.
7.1 Avoiding Harsh Chemicals
Avoid using harsh chemicals‚ abrasive cleaners‚ or strong detergents on car decals‚ as they can damage the vinyl or cause the adhesive to fail. Instead‚ clean decals with a mild soap and water solution to maintain their appearance. Avoid exposing decals to high-pressure washes or acidic substances‚ as these can weaken the material and lead to fading or peeling. Regular cleaning with gentle products ensures the decals remain vibrant and securely attached to the vehicle’s surface‚ preserving their durability and visual appeal over time.
7.2 Regular Cleaning of Decals
Regular cleaning is crucial to maintain the appearance and longevity of car decals. Use a mild soap solution and a soft‚ non-abrasive cloth to gently wipe away dirt and grime. Avoid using high-pressure washes‚ as they can damage the decal or loosen the adhesive. For tougher stains‚ lightly scrub with a clean‚ damp cloth‚ but avoid using harsh chemicals or abrasive materials. After cleaning‚ dry the decal thoroughly with a microfiber cloth to prevent water spots. Regular maintenance ensures decals remain vibrant and securely attached‚ enhancing your vehicle’s overall look for years to come.
7.3 Avoiding High-Pressure Washes
High-pressure washes can severely damage car decals‚ leading to peeling‚ fading‚ or complete removal. The intense force of the water can dislodge the adhesive‚ especially around the edges‚ and cause bubbles or wrinkles. To protect your decals‚ avoid using pressure washes or adjust the nozzle to a wide fan tip and keep it at least 12 inches away. Hand washing with mild soap and water is the safest method to maintain both the decal and the vehicle’s surface‚ ensuring the decals remain intact and visually appealing for a longer period.

Legal Considerations
Ensure decals comply with local laws‚ including registration and permit requirements. State-specific regulations may apply‚ especially for special decals like Clean Air Vehicle (CAV) stickers. Always verify compliance to avoid penalties.
8.1 Registration and Permit Decals
Registration and permit decals are legally required for vehicle identification and compliance. These decals‚ such as Clean Air Vehicle (CAV) stickers‚ must be obtained through official channels like the DMV. Applications often require fees and specific documentation‚ ensuring decals are non-transferable and linked to the vehicle. Proper display of these decals avoids legal penalties and ensures smooth operation in regulated areas like HOV lanes. Always follow state guidelines for issuance and placement to maintain compliance and avoid enforcement issues. Timely renewal is also crucial to avoid expired decals.
State-specific regulations dictate unique requirements for car decals‚ varying by jurisdiction. For instance‚ California mandates Clean Air Vehicle (CAV) decals for HOV lane access‚ while Florida requires specific decals for hybrid vehicles using express lanes. Each state may have different fees‚ documentation needs‚ and display rules. Non-compliance can result in fines or penalties. It’s crucial to research and adhere to local laws‚ ensuring decals are correctly applied and valid for your region. Always check with your state’s DMV for the most accurate and up-to-date information to avoid legal complications. Proper compliance ensures smooth travel across state lines. Compliance with local laws ensures your car decals meet community standards and avoid legal issues. Some areas restrict certain types of decals‚ such as oversized or reflective ones‚ while others require specific permits. For example‚ vintage or commemorative decals may need special approval. Always verify with local authorities to confirm decal regulations‚ especially if moving or traveling. Proper compliance helps maintain legal conformity and preserves the appearance of your vehicle. Researching local ordinances beforehand is essential to avoid fines or removal mandates‚ ensuring your decals remain both stylish and lawful. This step is crucial for a hassle-free ownership experience. Master advanced techniques like applying large decals‚ layering‚ and handling complex shapes to achieve intricate designs and enhance your vehicle’s customization. This step requires precision and skill. Applying large decals requires precision to ensure proper alignment and adhesion; Start by cleaning the surface thoroughly. Use a wet application method for easier placement‚ applying a soap and water solution to the area. Position the decal using masking tape as a guide‚ then squeegee from the center outward to remove air bubbles. Use a level to ensure straight alignment. Avoid stretching the decal‚ as this can cause distortion. Allow the decal to dry completely before handling the vehicle. Proper technique ensures a professional finish and long-lasting durability for your large car decals. Layering decals involves applying multiple layers to create intricate designs or complex graphics. Start with the largest decal as the base‚ ensuring proper alignment. Each subsequent layer should be centered or positioned according to the design. Use transfer tape to handle smaller decals‚ applying them slowly and smoothing with a squeegee. Avoid stretching the vinyl‚ as this can cause distortion. Allow each layer to set before adding the next to ensure proper adhesion. Inspect the final result for air bubbles or misalignment‚ addressing issues promptly for a seamless‚ professional finish. Complex shapes require precise cutting and alignment to ensure a seamless fit on curved or irregular surfaces. Cut the decal into smaller sections if necessary‚ using transfer tape to manage intricate details. Apply each part slowly‚ smoothing with a squeegee to prevent air bubbles. For deep curves‚ gently stretch the vinyl while applying‚ ensuring it conforms naturally. Use a heat gun on a low setting to mold the decal around sharp angles or contours. Regularly inspect the decal for alignment and smoothness‚ making adjustments as needed to achieve a professional‚ wrinkle-free finish. Identify and address issues like bubbles or misalignment by checking surface preparation and application techniques. Ensure proper cleaning‚ temperature‚ and method use for optimal results. Bubbles and air pockets are common issues during decal application. To fix‚ use a squeegee or credit card to gently press out air from the center outward. For persistent bubbles‚ carefully pierce with a needle and smooth the area. Ensure the surface is clean and dry before applying. Applying heat with a hairdryer can also help eliminate trapped air. Prevent bubbles by avoiding excessive water and ensuring the decal aligns properly during placement. Proper surface preparation and smooth application techniques minimize these issues. Misalignment and crooked decals can ruin the professional look of your vehicle. To prevent this‚ use masking tape to center and align the decal before applying. Start by taping the decal in place and ensuring it’s straight with a level. If the decal becomes crooked during application‚ gently peel it back and reposition. Work slowly and use a squeegee to smooth out the decal from the center outward. For large decals‚ applying in small sections and checking alignment frequently helps prevent misalignment. Patience and precision are key to achieving a straight‚ professional finish. Adhesive failure occurs when the decal doesn’t stick properly to the surface. This is often due to dirt‚ oil‚ or moisture on the application area. Ensure the surface is clean and dry before applying. Incorrect temperature can also cause failure; apply decals in moderate temperatures (60–74°F). If the decal starts to peel‚ reapply using a squeegee or credit card. For stubborn areas‚ lightly heat the decal with a hairdryer to reactivate the adhesive. Avoid using harsh chemicals‚ as they can weaken the adhesive. Proper surface preparation and application techniques are crucial for long-lasting adhesion. Applying car decals requires attention to detail and proper techniques. Ensure the surface is clean‚ align the decal correctly‚ and press firmly for a professional finish. Always clean the surface thoroughly before application. Use the wet or dry method‚ depending on decal size and complexity. Center and align the decal carefully‚ using tools like a squeegee or credit card to press firmly. Remove transfer tape slowly after application. Allow proper drying time and avoid harsh chemicals or high-pressure washes. Regular cleaning and avoiding extreme temperatures will ensure longevity. Follow these steps for a professional‚ long-lasting finish. Clean the surface thoroughly before application to ensure proper adhesion. Use a squeegee or credit card to apply even pressure‚ starting from the center and moving outward to avoid air bubbles. Apply decals in a shaded area to prevent the adhesive from setting too quickly. Allow the decal to set for at least 24 hours before washing the vehicle. For a professional finish‚ use a level to ensure straight alignment and avoid stretching the decal during application. Handle transfer tape carefully to prevent misalignment. Patience and careful handling will result in a long-lasting‚ professional appearance.8.2 State-Specific Regulations
8.4 Compliance with Local Laws
Advanced Techniques
9.1 Applying Large Decals
9.2 Layering Decals
9.3 Handling Complex Shapes

Troubleshooting Common Issues
10.1 Bubbles and Air Pockets
10.2 Misalignment and Crooked Decals
10.3 Adhesive Failure
11.1 Summary of Key Steps
11.2 Final Tips for a Professional Finish