sheet cake cutting guide
Cutting a sheet cake into uniform portions is straightforward with the right techniques. Proper methods ensure even slices, making serving efficient and visually appealing. Learn how to achieve perfect cuts effortlessly.
1.1 What is a Sheet Cake?
A sheet cake is a large, rectangular cake baked in a flat pan, typically measuring 16x24x2 inches. It is often used for large gatherings due to its size. Available in full, half, or quarter sizes, sheet cakes are versatile and ideal for events like birthdays or weddings. They can be homemade or store-bought, offering a convenient dessert solution for crowds. Their flat shape makes them easy to decorate and cut into uniform portions.
1.2 Importance of Proper Cutting Techniques
Proper cutting techniques ensure even, visually appealing slices and prevent the cake from tearing or crumbling. Clean cuts maintain the cake’s presentation, making it more attractive for guests. Even portions also help in serving consistency, avoiding waste, and ensuring everyone gets a fair share. Proper techniques enhance efficiency and make the serving process smoother, contributing to a better overall experience for both hosts and guests.
1.3 Common Occasions for Serving Sheet Cakes
Sheet cakes are ideal for large gatherings, such as parties, weddings, corporate events, and community functions. Their size and ease of serving make them perfect for feeding crowds. They are also popular at birthday celebrations, graduations, and family reunions. The convenience of sheet cakes ensures they are a staple at social events, offering uniform portions and hassle-free serving, making them a practical choice for hosts seeking efficiency and simplicity.
Understanding Sheet Cake Sizes
A standard sheet cake measures 16x24x2 inches, with half and quarter sizes available. These dimensions help determine the number of servings for any event.
2.1 Standard Sheet Cake Dimensions
A standard sheet cake measures 16x24x2 inches, offering ample servings for large gatherings. This size is ideal for events, providing uniform cuts and easy portion control. Knowing these dimensions helps in determining the number of servings and ensures efficient slicing. The 16x24x2-inch size is a common standard, making it easier to plan and serve evenly. This measurement is crucial for achieving clean, professional-looking slices every time.
2.2 Half and Quarter Sheet Cake Options
Half and quarter sheet cakes offer flexibility for smaller events. A half sheet measures 12x16x2 inches, ideal for intimate gatherings, while a quarter sheet is 8x12x2 inches, perfect for cozy parties. These sizes reduce waste and ensure every guest gets a generous portion. They maintain the same height as standard cakes, making them easy to cut uniformly. Half and quarter options are versatile, catering to various group sizes without compromising on taste or presentation.
2.3 Determining Cake Size for Specific Events
Choosing the right sheet cake size ensures ample servings without excess. A standard 16×24-inch cake typically serves 64 to 192 people, depending on slice size. For smaller gatherings, half or quarter sheets are ideal, offering 32 to 96 servings. Consider the event’s guest count and slice preferences to select the perfect size. Always check the packaging or pan dimensions for accurate sizing to match your event needs precisely.

Essential Tools for Cutting a Sheet Cake
A sharp, long serrated knife is crucial for clean cuts. Use a small spatula for serving and a cutting board for stability. Dental floss can help achieve perfect edges.
3.1 Sharp, Long Serrated Knife
A sharp, long serrated knife is essential for cutting sheet cakes. Its serrated edge helps saw through the cake without crushing it, while the length allows for even, straight cuts across the entire surface. This tool ensures clean, precise slices and prevents the cake from tearing or breaking apart. A dull knife can ruin the presentation, so always use a well-maintained blade for the best results.
3.2 Small Spatula for Serving
A small spatula is a must-have for serving sheet cakes. It helps in gently lifting and transferring slices without breaking or smudging the frosting. The spatula also allows for precise portion control, ensuring each slice is neatly presented. Its compact size makes it ideal for maneuvering around the cake and serving individual portions efficiently. Always keep it clean and ready to maintain hygiene and presentation standards while serving.
3.3 Cutting Board or Non-Slip Surface
A cutting board or non-slip surface is essential for stable cake cutting. It prevents the cake from shifting during slicing, ensuring clean, even cuts. Place the cake on a sturdy board or mat to avoid accidents and maintain control. A non-slip surface also protects your work area from damage. For added grip, lightly dampen the surface or use a cake stand with a built-in mat. This setup guarantees safety and precision while cutting.
3.4 Optional: Dental Floss for Clean Cuts
Dental floss is a clever tool for achieving clean, even cuts. Use unflavored floss to avoid imparting tastes. Wrap it around your fingers, align with scoring lines, and press down evenly. This method minimizes pressure, reducing the risk of tearing. For best results, use a new strand for each cut to maintain hygiene and precision. Dental floss is an excellent alternative to traditional knives for perfectly straight edges and professional-looking slices.

Preparing the Cake for Cutting
Move the cake to a stable surface, score it lightly with a spatula or knife, and set up cutting guides for even portions. This ensures smooth slicing.
4.1 Moving the Cake to a Stable Surface
Transfer the sheet cake to a sturdy, non-slip surface like a cutting board or cake stand. Ensure it’s level and secure to prevent movement during cutting. If using a cake board, keep it intact. For cakes without a board, place them on a large cutting board or mat to maintain stability. This setup minimizes the risk of the cake shifting and ensures clean, precise cuts.
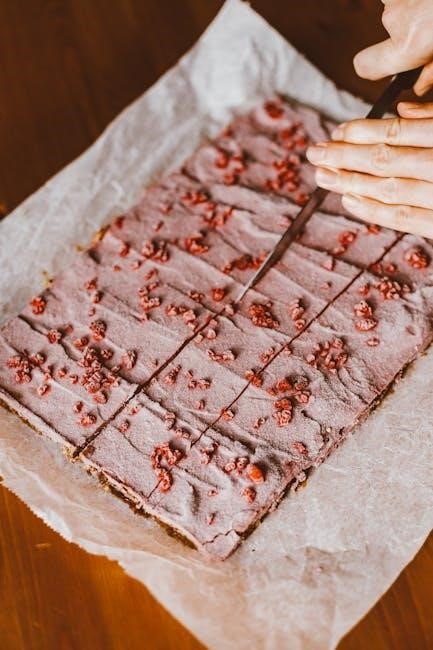
4.2 Scoring the Cake for Even Slices
Use a flat spatula or butter knife to lightly score the cake’s surface, creating guides for cuts. Measure intervals based on desired serving sizes, such as 1-3 inches, and mark the cake accordingly. Scoring helps achieve even slices without compressing the cake. While optional, it ensures precision and prevents uneven cuts. For accuracy, place a ruler alongside the cake and gently press the tool at each marking. This step can also be done in advance to save time during serving.
4.3 Setting Up a Cutting Guide
Set up a cutting guide by aligning a ruler with the cake’s edges and marking desired slice intervals. Use a flat tool to lightly press lines across the cake’s surface, ensuring even spacing. This guide helps prevent uneven cuts and ensures consistency. Place marks at measured intervals, such as 1-3 inches, depending on serving size preferences. The guide minimizes errors and makes the cutting process more efficient and precise.
Cutting Techniques for Uniform Portions
Use vertical cuts for large sections and horizontal cuts for individual slices. Apply steady, even pressure and wipe the knife between cuts for clean, consistent results.
5.1 Vertical Cuts for Large Sections
Start by making vertical cuts to divide the cake into large, even sections. Use a long serrated knife, aligning it with your pre-scored lines. Apply steady, even pressure and ensure the knife reaches the bottom of the pan. This method helps maintain uniformity and prevents the cake from tearing. Wipe the knife clean between cuts to avoid transferring frosting and ensure smooth, precise slices every time.
5.2 Horizontal Cuts for Individual Slices
After making vertical cuts, use horizontal cuts to create individual slices. Hold the knife at a slight angle and align it with the pre-scored lines. Gently saw through the cake, applying even pressure. For cleaner cuts, optionally use dental floss, pulling it taut and guiding it along the scored lines. This method ensures uniform slices and prevents tearing. Handle each slice carefully to maintain their integrity and presentation.
5;3 Using Dental Floss for Perfect Edges
For pristine, clean cuts, use unflavored dental floss. Cut a length slightly longer than the cake. Wrap the floss around your fingers, align it with the scoring lines, and gently pull it taut. This method ensures smooth, even edges without crumbling. Replace the floss for each cut to maintain cleanliness. Dental floss is ideal for achieving professional-looking slices with minimal effort and maximum precision.
Serving and Portion Control
Determine serving size based on guest count. Calculate portions using cake dimensions. Use tools like spatulas for clean handling and even distribution. Ensure efficient service with a serving guide.
6.1 Recommended Serving Sizes
Standard serving sizes for sheet cakes are typically 1×2 inches or 2×2 inches. A full sheet cake yields 64-96 servings, while half and quarter sizes offer 36-54 and 18-24 servings, respectively. Adjust slice dimensions based on event type and guest preferences for larger or smaller portions. Ensure even distribution by pre-scoring the cake, making portion control easier and more precise during serving.
6.2 Calculating Servings Based on Cake Size
To determine servings, measure the cake’s length, width, and height. A full-size sheet cake (16x24x2 inches) typically yields 64-96 servings, while half and quarter sizes offer 36-54 and 18-24 servings, respectively. Use a ruler to mark slices at 1- to 3-inch intervals, depending on desired portion size. This method ensures accurate portion control and even distribution for any event size.
6.3 Tips for Handling and Serving
Use a non-slip surface or cutting board to stabilize the cake while cutting. Wipe the knife between cuts to prevent frosting buildup and ensure clean slices. For tidy serving, slide a spatula under each portion to lift and transfer to plates. Consider using dental floss for precise, mess-free cuts. Always handle the cake gently to avoid breaking or crumbling, and serve at room temperature for the best texture and ease of slicing.
Common Mistakes to Avoid
Common mistakes include cutting without scoring, using a dull knife, and overcrowding the cake surface. These errors lead to uneven slices and a messy appearance.
7.1 Cutting Without Scoring or Guides
Cutting without scoring or guides is a common mistake that leads to uneven slices. Scoring the cake first creates a clear guide, ensuring even portions. Without it, cuts can be crooked, resulting in messy, uneven pieces. This not only affects the presentation but also makes serving inconsistent. Always take a moment to score or mark your cake before cutting to achieve clean, professional-looking results.
7.2 Using a Dull or Improper Knife
Using a dull or improper knife can ruin the appearance of your sheet cake. A dull blade tears the cake instead of cutting cleanly, leading to uneven, messy slices. Always use a sharp, long serrated knife, as it glides smoothly and prevents crushing. Wipe the knife between cuts to remove excess frosting, ensuring crisp, clean edges every time. Proper tools are key to achieving professional-looking results.
7.3 Overcrowding the Cake Surface
Overcrowding the cake surface can lead to messy, uneven slices. Cutting too many portions at once causes the knife to drag and smear frosting. For clean results, cut one slice at a time, lifting each with a spatula. Plan your cuts in advance using a guide to ensure even distribution and maintain the cake’s appearance.
Additional Tips for Clean and Even Cuts
Maintaining room temperature ensures easier slicing. Wipe the knife between cuts to prevent frosting buildup. Use dental floss for precise edges and avoid applying direct pressure on the cake.
8.1 Wiping the Knife Between Cuts
Wiping the knife between cuts is crucial for clean, even slices. Use a paper towel or clean cloth to remove excess frosting or debris. This prevents residue from transferring to other parts of the cake, ensuring precise cuts. Regular wiping also maintains the knife’s edge, allowing for smoother, more controlled movements. Clean cuts enhance the appearance and consistency of the slices, making the cake more appealing to serve.
8.2 Maintaining Room Temperature for Easier Slicing
Maintaining room temperature ensures the cake is soft yet firm, making it easier to slice cleanly. Avoid refrigerating the cake before cutting, as a chilled cake can be harder to cut evenly. Let the cake sit at room temperature for about 30 minutes before slicing to achieve smooth, consistent cuts without crumbling or tearing. This step is essential for achieving professional-looking results.
8.3 Avoiding Direct Pressure on the Cake
Avoiding direct pressure prevents the cake from tearing or frosting from smudging. Use gentle, light strokes with your knife, applying minimal force to maintain clean cuts. Excessive pressure can distort the cake’s structure, leading to uneven slices and an unprofessional appearance.
Instead, rely on the sharpness of your knife or tools like dental floss to glide through the cake smoothly. Wipe the knife between cuts to avoid dragging frosting or debris, ensuring each slice remains pristine and perfectly portioned.
Frequently Asked Questions
Common questions include tips for transporting sheet cakes safely, whether to cut ahead of time, and how to store leftovers properly to maintain freshness and presentation.
9.1 How to Transport a Sheet Cake Safely
Transporting a sheet cake requires care to prevent damage. Keep it in the original pan or on a sturdy, flat surface. Use a non-slip mat or dish towel to stabilize the cake during movement. Avoid placing it directly on smooth surfaces without support. Secure the cake firmly to prevent shifting, and handle it gently to ensure it arrives intact and ready to serve.
9.2 Can I Cut a Sheet Cake Ahead of Time?
Cutting a sheet cake ahead of time is possible but requires careful planning. Lightly score the cake to mark portion sizes without cutting through. This prevents the cake from drying out and keeps it fresh. If pre-cutting, store slices in an airtight container at room temperature or refrigerate for up to 24 hours. Avoid freezing pre-cut slices to maintain texture and flavor quality.
9.3 How to Store Leftover Sheet Cake
Store leftover sheet cake in an airtight container at room temperature for up to 2 days or refrigerate for 4-5 days. For longer storage, wrap tightly in plastic wrap or aluminum foil and freeze for up to 3 months. Let frozen slices thaw at room temperature before serving. Avoid freezing pre-cut slices to maintain texture and flavor quality. Proper storage ensures freshness and prevents drying out.
Mastering sheet cake cutting ensures even, impressive portions. With proper tools and techniques, you can achieve clean, uniform slices every time, making any event a success.
10.1 Summary of Key Cutting Tips
Use a sharp, serrated knife and score the cake beforehand for even cuts. Clean the knife between slices to prevent frosting buildup. Dental floss can create perfect edges. Always cut on a stable surface and consider room temperature for easier slicing. Scoring guides help maintain uniformity, while vertical and horizontal cuts ensure precise portions. These techniques guarantee professional-looking results and satisfy your guests with consistent servings.
10.2 Final Thoughts on Achieving Perfect Slices
Achieving perfect sheet cake slices requires patience, the right tools, and a bit of practice. Always use a sharp knife, score beforehand, and maintain a clean blade. Dental floss can add precision, while room temperature ensures easier cutting. By following these tips, you’ll consistently deliver uniform, professional-looking portions. Remember, clean cuts enhance both presentation and serving efficiency, making your sheet cake a standout at any event or gathering.